Hey moms! How is your day? We are so excited to share the wonderful things we have up our sleeves for Up and Away Moms. Adventures from our travels and many tips coming from me and the mouths of other experienced moms based on the tried and true.
Every mama needs that extra boost. Sometimes just knowing that you are not the only one with the daily struggles of tantrums and spilled milk and a community to share that is what can help you get through the day. I want to share a positive energy here at Up and Away Moms as genuinely as possible to share mine and other moms stories, laughs and wisdom.
Hi there! My name is Rebecca. Welcome to Up and Away Moms and thanks for stopping by! I am a mother of two, wife of an amazing husband and I am a professional juggler… daily. As in, I am a mom. Not a day goes by that at some point I don’t feel like I have joined the circus!
I started Up and Away Moms as a sanity zone for moms, to uplift, inspire and motivate. So join me for a laugh, learning from mine and other moms and their experiences. Here we have the DIY inspiration, Baking, Planning, Tips and Tricks for managing motherhood, Stories from the heart and a good laugh to share! May what you find here give you that extra little boost, because you CAN do it! Even with spilled milk.
We are celebrating Milo’s 2nd birthday this week! And for his 2nd year photo shoot, we went with an aviator theme because he is in LOVE with airplanes. He almost always is holding a little toy in one hand, such as a plan, train, car or dinosaur. So sweet. These adorable clouds are very simple to make! I think they are so fun to hang up in a nursery to add a bit of heaven to the room.
What you’ll need:
white paper lanterns (we used 12″ lanterns from LIHAO, White Round Paper Lanterns)
Hooks or other secure and safe system to hang them on the ceiling
To make these cute clouds, simply open the stuffing. The kids LOVED helping with this part. We had 2 large bags of stuffing that made about 4-5 large clouds + some for sitting on. The kids loved jumping in the piles of fluff!
Assemble your paper lanterns
Warm up your hot glue and when ready, glue zig zags in 8 inch areas so you can get the stuffing on before it cools.
Put one hand through the hole of the lantern and the other on the outside to gently clap your hands together to apply the pressure so the stuffing sticks.
Repeat until all the lantern is covered except for the holes.
Tie on your string and hang them at varying heights!
For an additional special effect, add ACPtek LED Part Lights for a unique effect of glowing from the inside. Be sure these lights are secure tied into your lanterns.
Funny side story about these clouds. I had them hanging in my kitchen after we had done this shoot, and I was babysitting for a friend. Her little 5 year old boy asked me what it was and I said , “a cloud!” and he asked if it was real. I held a staight face and told him that I had captured the cloud with a really long rope. For about 5 minutes he stared at the cloud trying to figure it out and then finally he stands up and puts his hand though the bottom hole of it and says, “It’s not a cloud! See… I can put my hand through it! You tricked me!”
So funny and sweet, but the best thing was when after that he said, “you know… if you really wanted to catch a cloud you would need a really really long rope!”
I died! I love children’s imaginations of how much is possible in their mind.
When my husband was a little boy, about 3, he thought the smoke coming from a factory was a cloud maker. Sweet young innocence.
Share your results with us! What will you use these cute clouds for? Props? Nursery decor? Let us know in the comments below!
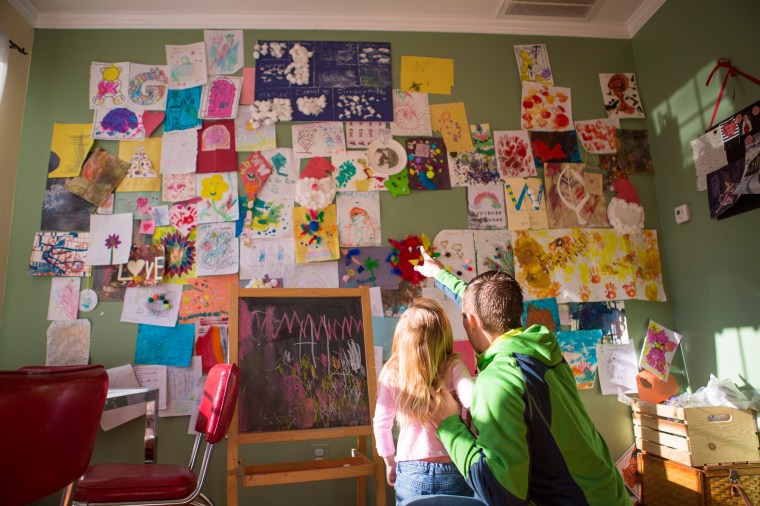
It happens daily, if not multiple times a day, your sweetie brings you their masterpiece. They might even do that shoulder to the cheek moment and that little look of pride on their face as you graciously accept it, listening to what it was and then you display it for a while. But it builds up fast! Here are some tips to managing all that artwork clutter without letting go of the sentimental side.
Before you get started, determine your own scale. 1. Direct to trash 2. Cute, let’s hang it up for a while… snap and picture and throw it away when no one is looking and 3. Treasure! I am never throwing it away!
When your child presents their masterpiece to them, likely, more than anything, they want to see that you are proud of their accomplishment and proud enough to display it. They will likely forget about it soon enough, but the whole process will build a confidence in them and motivate them to do it again… even better.
But all that artwork stacks up FAST! Especially those cotton ball and feather covered paper plates and other 3D creations.
Tips to clear the clutter!
Select a wall and a timetable. Clear, trash or keep and repeat. Snap a picture of the items as you go, with and/ or without your child.
Write is down. When you receive your child’s masterpiece, write down what they said it was, their age and name. Even a week later and it will slip your mind. What you do decide to keep in the long run will have more meaning if you remember what it was they drew, especially if paired with recent family events such as a fun trip to the beach.
Use them as scrapbook paper. Cut out the image to size and let it be the backdrop to pictures of the kids at those same ages.
Use 12 x 12 and 9 x 12 sized 3 ring Scrapbooks with Clear Sleeves for long term storage. Select a limited number of favorites to keep, take a picture of them, and throw away the undesirables. (We have loved Project Life Three Ring Albums)
Let us know what you like to do to display those masterpieces in the home! Comment below, or share your own child’s masterpieces.